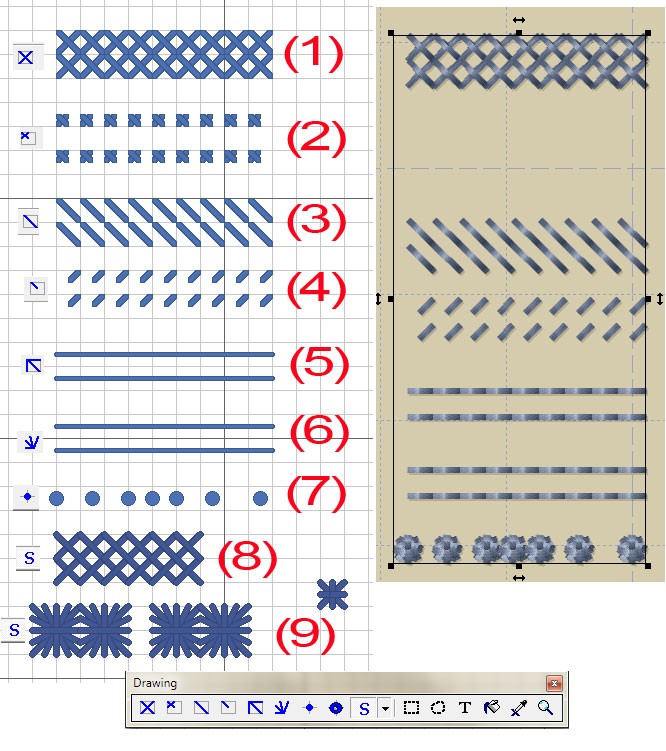
In the most popular cross-stitch software, Pattern Maker, the following basic types of stitches are primarily used:
- Full stitch — standard full cross stitch
- Petite stitch — small full cross stitch (takes up a quarter of a grid square)
- Half stitch — half cross stitch
- Quarter stitch — quarter cross stitch
- Back Stitch — outlining stitch
- Straight Stitch — standard straight stitch
- French Knot — decorative knot stitch
- Specialty Stitch — special type of stitch (refer to the specific pattern instructions)
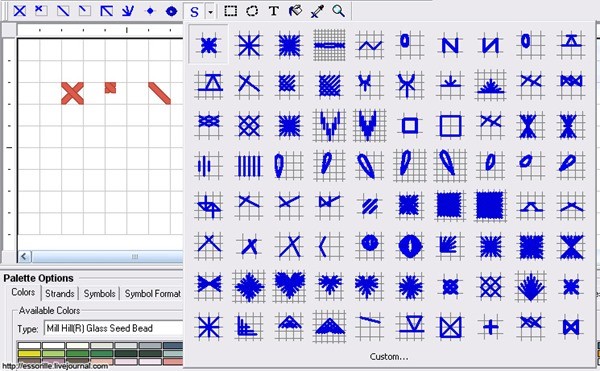
In addition to the basic stitches, the software includes special supplementary stitches. You can access them by clicking the arrow next to the “S” (Specialty stitch) button on the toolbar.
Stitch Execution Techniques
French Knot

- Bring the needle up from the back (wrong side) to the front (right side) at point A. With your non-dominant hand, wrap the thread around the tip of the needle once (or twice for a larger knot).
- Insert the needle back into the fabric as close to the previous exit point as possible (point B).
- Gently pull the working thread until the wrap tightens around the needle and lies flat against the canvas.
- Keeping the thread taut, pull the needle all the way through to the back of the fabric to complete the knot.
Half Stitch
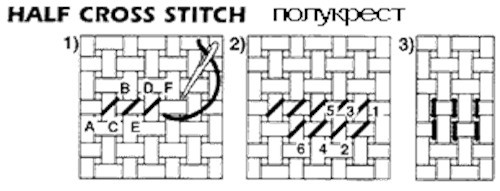
- Work the half cross stitches from left to right (from the bottom-left corner to the top-right). Start at point A, go diagonally up to point B, then bring the needle up at C and go down at D, continuing this way across the row as shown in the illustration.
- For the next row, continue stitching in the opposite direction (e.g., from the top-right corner to the bottom-left corner, 1-2, 3-4), following your pattern’s flow.
- On the back of the canvas, your stitches should look neat, typically forming vertical parallel lines.
Back Stitch
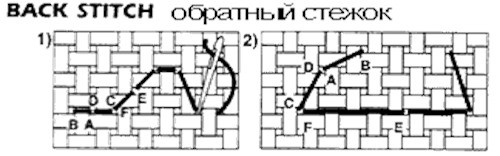
Work the stitches from right to left. Bring the needle up to the front at point A and push it down to the back at point B. Bring it up again at point C, then go backward and push it down at point D (which is the exact same hole as point A). Continue this process, always going back to meet the end of the previous stitch. Make all stitches correspond to the outline on the chart. It is recommended to break long continuous lines into several smaller stitches so that no single stitch exceeds 0.5 inches (1.3 cm) to prevent sagging.
Video: Stitch Settings in Pattern Maker



Ищу стежки для обработки края с басхромой для льняных полотенец