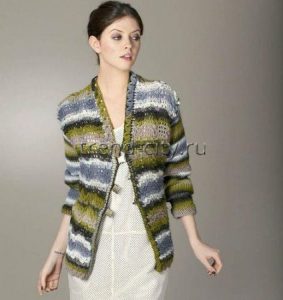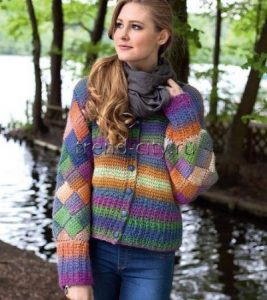
Instructions for the Chart “Crossed Bodice Crochet Top”
Size
36/38
You Will Need
- Yarn (70% cotton, 30% polyamide, 90 m/50 g) – 200 g cream and 100 g beige
- 5 mm crochet hook
Stitch Patterns and Charts
Main Stitch Pattern
Work dc rows back and forth, beginning each row with 3 ch (turning chain) instead of the 1st dc, and ending with 1 dc into the 3rd ch of the previous row’s turning chain.
Starting with row 2, always work the dc between the dc’s of the previous row, keeping the stitch count constant.
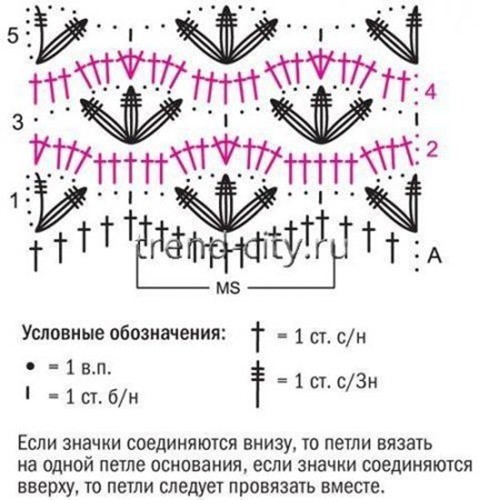
Wave Stitch Pattern
The number of stitches in the starting row is a multiple of 12, plus 9, plus 5 turning chain.
Work according to the chart directly along the edge of the main stitch pattern. Begin each row with the number of turning chains shown on the chart instead of the 1st stitch, and with the stitches before the repeat; repeat the pattern repeat continuously, and end with the stitches after the repeat.
Work right-side row A and rows 1-5 once, then repeat rows 2-5 continuously.
Important: starting with row 2, always work the dc into the chain of the previous row.
Gauge
12 dc x 7 rows = 10 x 10 cm, worked in main stitch pattern,
10.5 sts of starting row x 5.5 rows = 10 x 10 cm, worked in wave stitch pattern.
Pattern Pieces
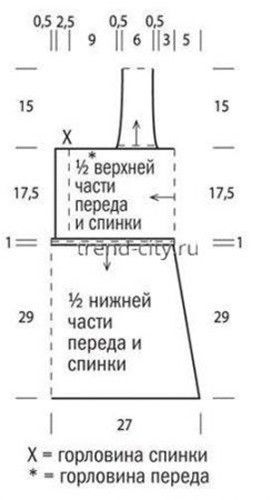
Note! First crochet the upper front piece sideways as a single piece, then crochet the straps and lower part onto it. Arrows on the schematic = direction of work.
Instructions
Upper Front
With beige yarn, make a starting chain of 21 ch + 3 turning ch, then work in main stitch pattern. Finish the piece after 81 cm = 57 rows from the starting row.
Twist the upper front piece (in the 2nd half, the wrong side faces the right side), then sew the starting and last rows together. The seam = center back, the twisted spot forms the center of the upper front.
Lower Back
Work along the left edge of the upper front piece in wave stitch pattern with cream yarn; in right-side row A, work 2 dc and 1 dc into the seam for every 20 cm = 14 dc of the edge on each side of the center back seam = 57 dc. Right-side row A is accounted for as 1 cm on the schematic and is not counted further = 4 repeats + starting and ending stitches.
Important: as you attach it, the pattern along the edge of the upper front will gather in, and will widen again as the height increases. This is shown on the schematic as a slant.
Finish the piece after 29 cm = 16 rows from attaching the lower part.
Lower Front
Work the same as the lower back, except work right-side row A as follows: attach new yarn next to the last edge dc of the lower back at the same edge dc of the upper front, work 3 turning ch and 1 dc into the same edge stitch, work 2 dc into each of the next 11 free edge dc, skip the center front with 9 ch, work 2 dc into each of the next 11 free edge dc, finish with 2 dc into the same edge stitch as at the start of the lower back (at the side edges, work 4 dc into 1 edge stitch, respectively) = 57 sts of the starting row.
Straps
Divide the right edge of the upper front as follows: leave 8 edge dc free on each side of the center back seam for the neckline, mark the next 5 edge dc as the spot for attaching the straps to the back, leave the next 4 edge dc free for the armholes, mark the next 5 edge dc, and leave the next 4 edge dc free for the armholes, respectively.
Work the following 5 edge sc for the straps as follows: attach cream yarn to the 1st dc and work 3 ch instead of the 1st dc, 2 dc into the 2nd edge dc, 1 dc into the 3rd edge dc, 2 dc into the 4th edge dc, and 1 dc into the 5th edge dc = 7 dc. Then work in main stitch pattern.
Finish the strap after 30 cm = 21 rows from the start.
Finishing
Stretch the straps and sew them to the marked 5 edge dc of the back.
Sew the side seams of the lower part.