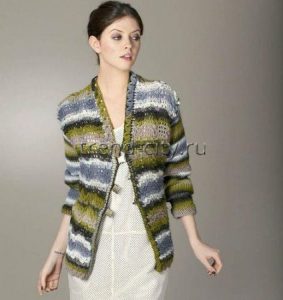
Pattern description: Crochet Tunic Dress with Sequins
Sizes
S/M (M/L) L/XL
Garment width at bust: 138 (146) 154 cm
Garment length: approximately 80 (82) 84 cm
You will need
- yarn (53% mohair, 13% wool, 26% silk, 4% polyamide, 4% polyester, 50 g/280 m) — 8 (8) 9 skeins of silver-gray, 3.5 mm and 4 mm crochet hooks
- 12 (13) 14 m of sequin trim
Stitch Patterns and Charts
Main Stitch Pattern
Row 1 (= WS row): ch 1, work 1 sc in each chain of the starting chain.
Row 2: turn with 2 turning chains and work 1 dc in each sc.
Row 3: turn with 1 turning chain and work 1 sc in each dc.
Repeat rows 2 and 3.
Decrease 1 st on the WS
Work 2 unfinished sc together: work each sc up to the last step, yarn over, then draw through all three loops on the hook at once.
Decrease 1 st on the RS
Work 2 unfinished dc together: work each dc up to the last step, yarn over, then draw through all three loops on the hook at once.
Increase 1 st
Work 2 sc or 2 dc into the same base stitch.
Gauge
20 sts x 18 rows = 10 x 10 cm, worked in the main stitch pattern with a 3.5 mm hook.
Your gauge must match the one given! Before starting, make a swatch: work a starting chain of 30 ch and work 14 cm in the main stitch pattern. Then count the stitches over a 10 cm section in the middle of the swatch: if there are more than 20 dc in that section, switch to a larger hook; if fewer, switch to a smaller hook. The most important thing is that your gauge matches the given width gauge.
If only one number is given in the instructions, it applies to all sizes.
Instructions
Back
With a 4 mm hook, make a starting loop and work a starting chain of 137 (145) 153 ch, switch to a 3.5 mm hook and work in the main stitch pattern — see above (row 1 = WS row).
Important: after the first 6 rows, on the next WS row decrease 2 sts evenly, then repeat these decreases every 4th row until 89 (97) 105 sts remain.
When the piece measures approximately 58 (59) 60 cm, finish with a WS row and shape the armholes over the next 6 rows:
Armhole decrease row 1: turn — right side. Work a sl st into each of the first 3 (5) 7 sts, ch 2, work 1 dc into each stitch, ending before the last 3 (5) 7 sts.
Armhole decrease row 2: turn — wrong side.
Work a sl st into each of the first 2 sts, ch 1, work 1 sc into each sc, ending before the last two stitches.
Armhole decrease row 3: turn — right side.
Work a sl st into each of the first 2 sts, ch 2, work 1 dc into each stitch, ending before the last two stitches.
Armhole decrease row 4: turn — wrong side.
Work a sl st into the 1st stitch, ch 1, work 1 sc into each stitch, ending before the last stitch.
Armhole decrease row 5: turn — right side.
Work a sl st into the 1st stitch, ch 2, work 1 dc into each stitch, ending before the last stitch.
Armhole decrease row 6: work as armhole decrease row 4.
Now there are 69 (73) 77 sts. Continue working in the main stitch pattern until the armhole measures approximately 17 cm, finish with a RS row.
On both sides of the center 29 (33) 37 sts, work decreases as described for the armholes = work from decrease row 2 through decrease row 6 (inclusive).
When the armhole measures 21 (22) 23 cm, fasten off.
Front
Work as for the back, but with a deeper neckline. When 12 cm remain to the end of the piece (check against the back), begin shaping the neckline.
Work on both sides of the center 21 (25) 29 sts = work decrease rows 2 and 3, then decrease rows 2 and 3 again, then decrease rows 4, 5 and 6.
Sleeves
With a 4 mm hook, make a starting loop and work a starting chain of 51 (55) 59 ch.
Switch to a 3.5 mm hook and continue in the main stitch pattern — see above (row 1 = WS row).
When the sleeve measures approximately 6 cm, increase 1 st on both sides after/before the 2 edge stitches. Repeat these increases every 6th row until there are 67 (69) 73 sts in the row.
When the sleeve measures approximately 33 cm, begin the sleeve cap decreases and work them as described for the armholes, but work only decrease row 2, decrease row 3, and decrease row 2 again (= 6 sts decreased on each side).
Then on every WS row decrease 1 st on both sides after/before the 2 edge stitches, 13 (14) 15 times, working decrease row 2, decrease row 3, and decrease row 2 again (= 6 sts decreased on each side), then fasten off.
Finishing
Sew the shoulder seams, side seams and sleeve seams, then set in the sleeves.
Ruffles
With a 3.5 mm hook, work into the sc row: 1 sc, ch 3, work 4 dc back into the same stitch, *skip 1 st and work a sl st into the next stitch, skip 1 st and work 5 dc into the next stitch*, repeat from * to *, finish: skip 1 st and work 1 sl st into the next stitch and 1 sl st into the 3rd chain from the start of the row.
Arrange the ruffles on the garment freely, or as shown in the photo.
Edging
First work a row of sc around the neckline edge, then work as for the ruffles.
Sew the sequin trim above the ruffles.