The pansy is a very popular flower in satin stitch embroidery, and there are countless color variations you can create with it. Here we offer a large selection of patterns for beginners, complete with step-by-step instructions for embroidering pansies in satin stitch.
Pansies
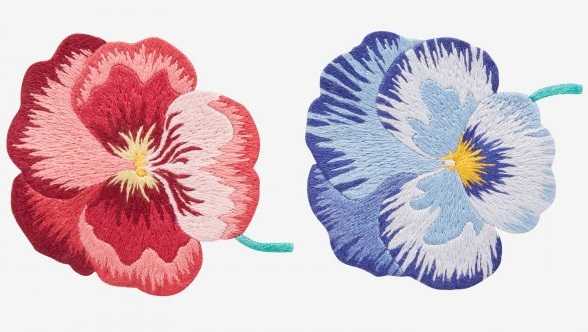
This motif is perfect for beginners to practice on. It’s worked in thread painting (needle painting), which means alternating long and short stitches.
The project won’t take much of your time – the finished composition measures 17 by 7 cm – but you can also stitch just one of the pansies if you prefer.
To embroider this design you’ll need fabric to “plant” your pansies on, an embroidery hoop, scissors, and other basic tools. We used DMC Mouline Special ART 117 floss here; if you have trouble finding this brand, feel free to substitute a similar one.
This motif uses a minimum of stitches – only satin stitches worked in the thread painting technique, alternating long and short stitches. The longest stitch should not exceed 1 cm, or the work will start to look uneven.
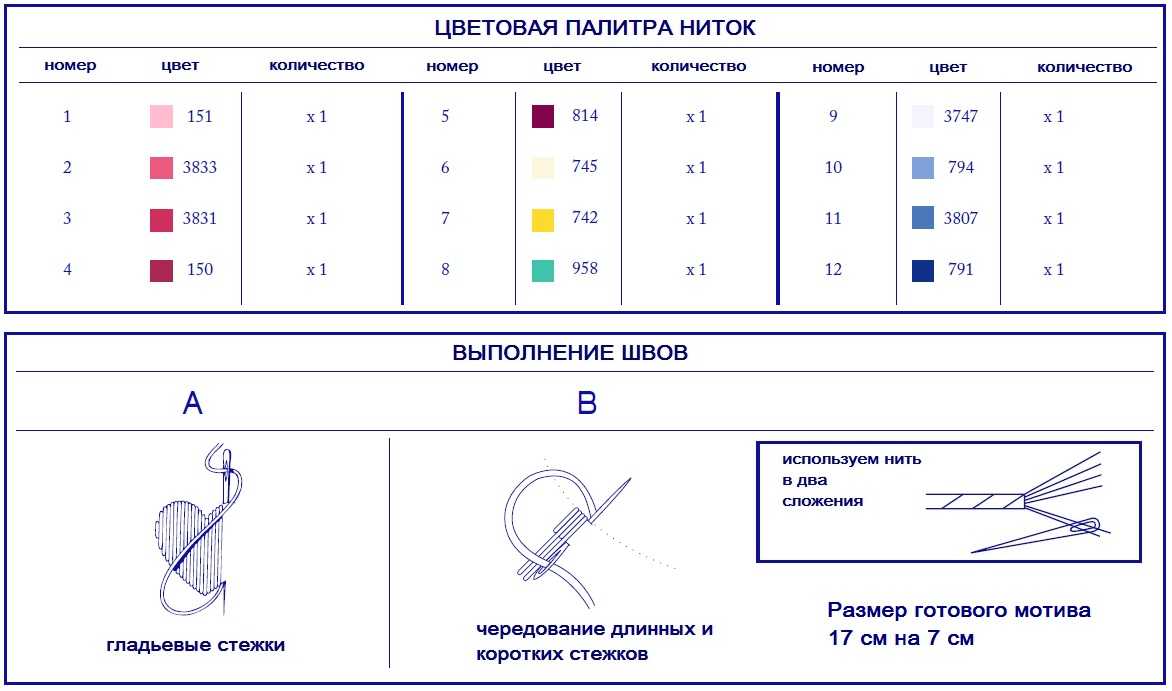
How to use satin stitch flower charts:
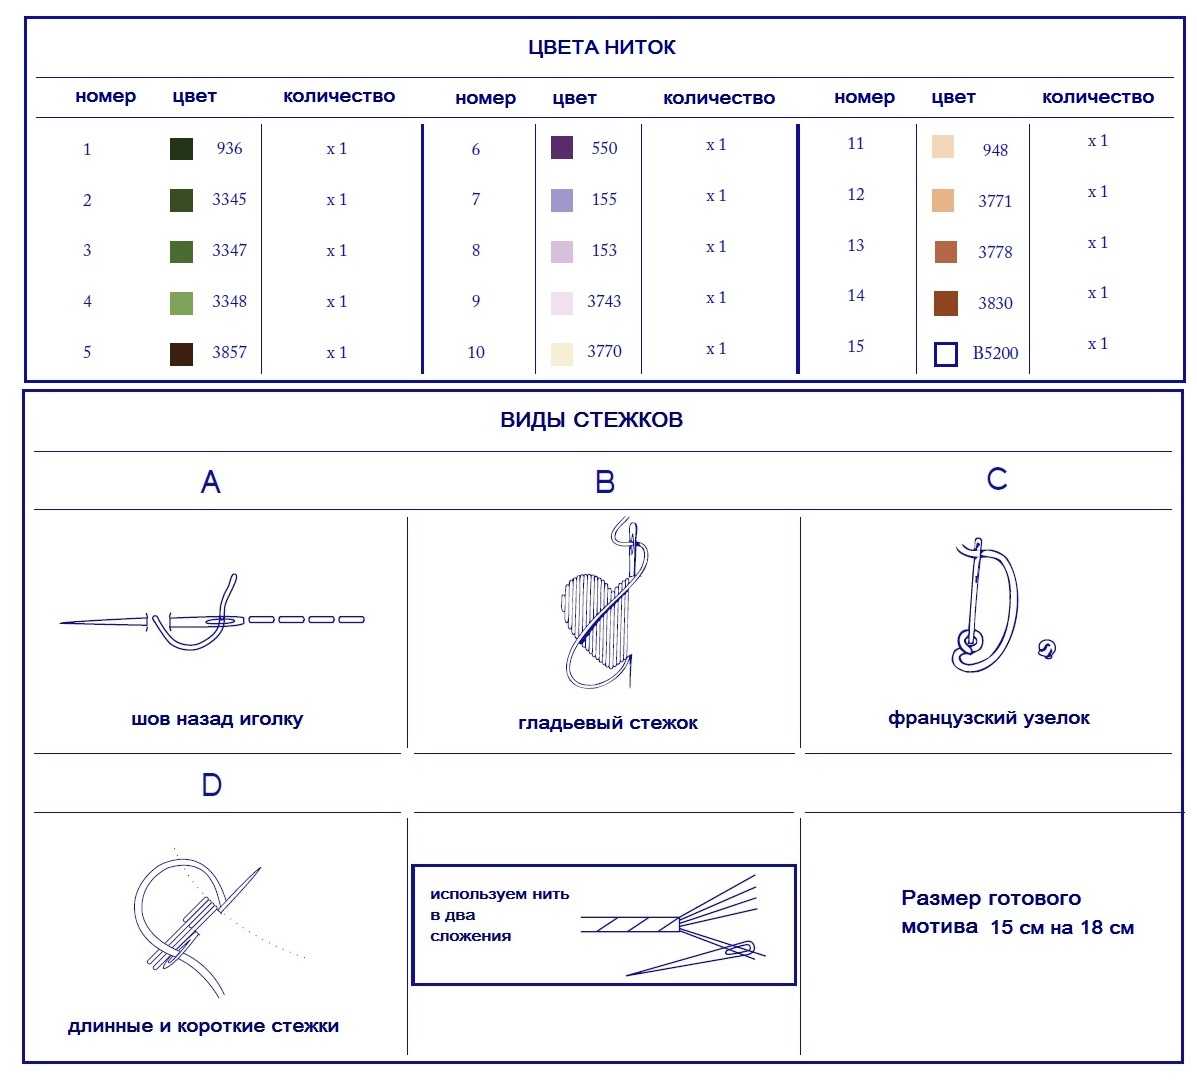
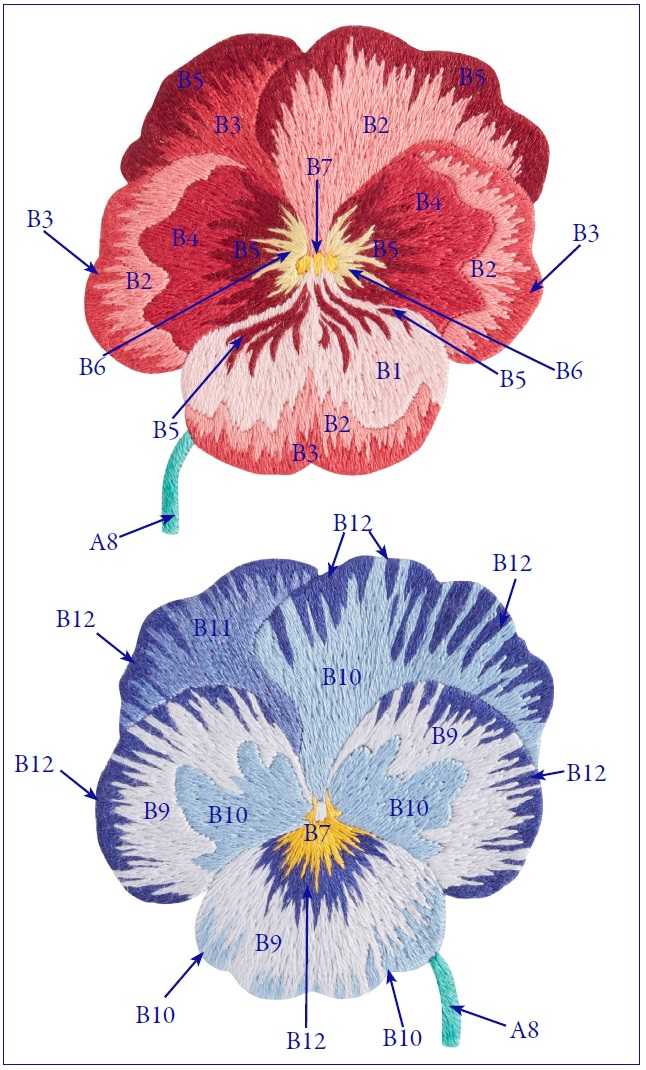
Download the design and transfer it onto your fabric. On the color chart, letters indicate the type of stitch and numbers indicate the thread color.
For example, in our chart B5 means: B – alternating long and short stitches, 5 – burgundy thread color #814. Simple as that.

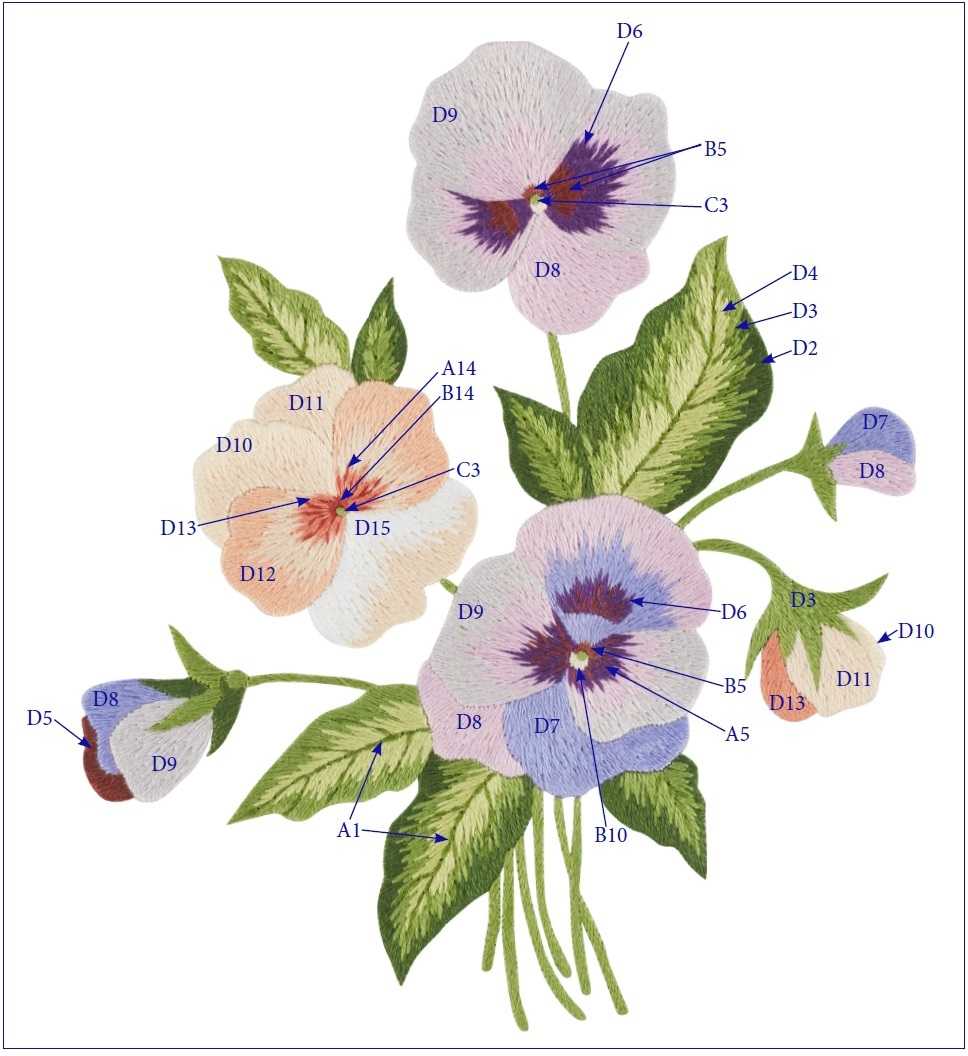
Lilac Pansy
 We suggest beginners try stitching this lovely lilac pansy. The design isn’t difficult to work, but it gives good practice with this embroidery technique.
The finished motif measures 13 by 15 cm.
You will need:
- an embroidery needle, fabric, an embroidery hoop, scissors, a thimble
- embroidery floss (the sample was worked in DMC Mouline Special ART 117)
We use the standard satin stitch techniques along with the French knot. You can refresh your memory on how to work the other stitches here.

This is the standard flower chart format we use on our site, where letters indicate the type of stitch and numbers indicate the thread color. For example, in this pansy chart D8 stands for alternating long and short satin stitches in light lilac color #153.


Cream Pansy
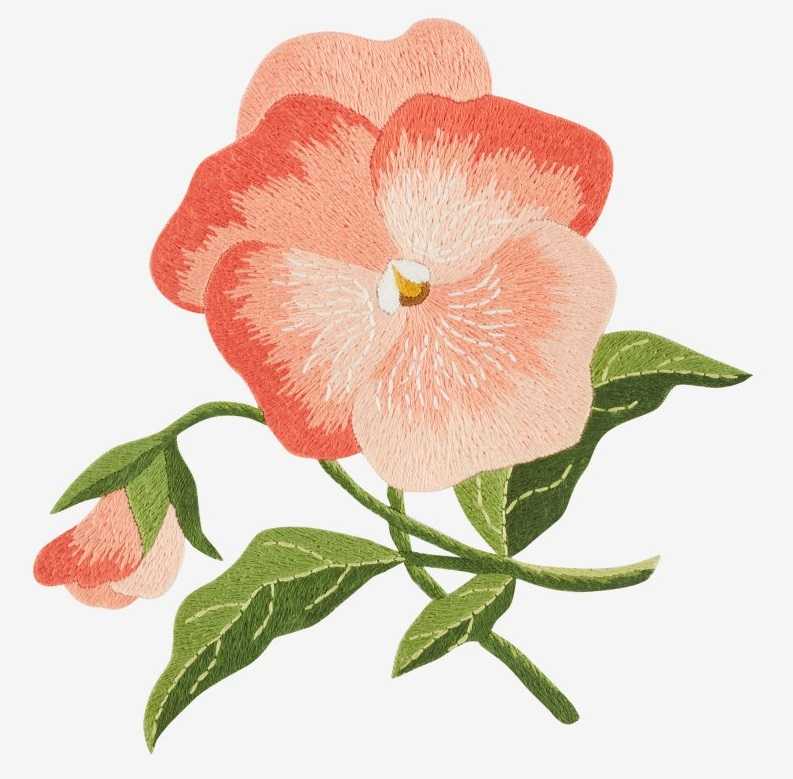
Satin stitch pansy designs are quite varied, and we keep building our skills in thread painting these beautiful flowers.
Our next motif is a cream-colored pansy.
You’ll need exactly the same supplies as for the previous design. The floss used is DMC Mouline Special ART 117.
The stitches used here are very simple: backstitch, French knot, and satin stitch.

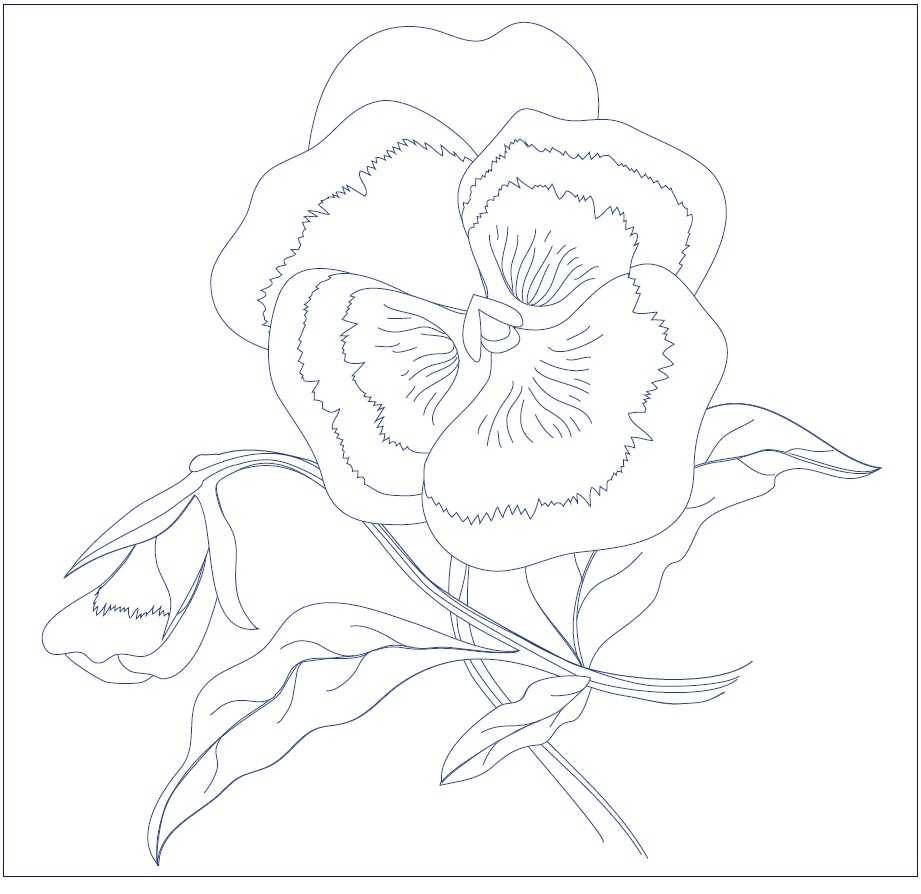

Pink Pansies
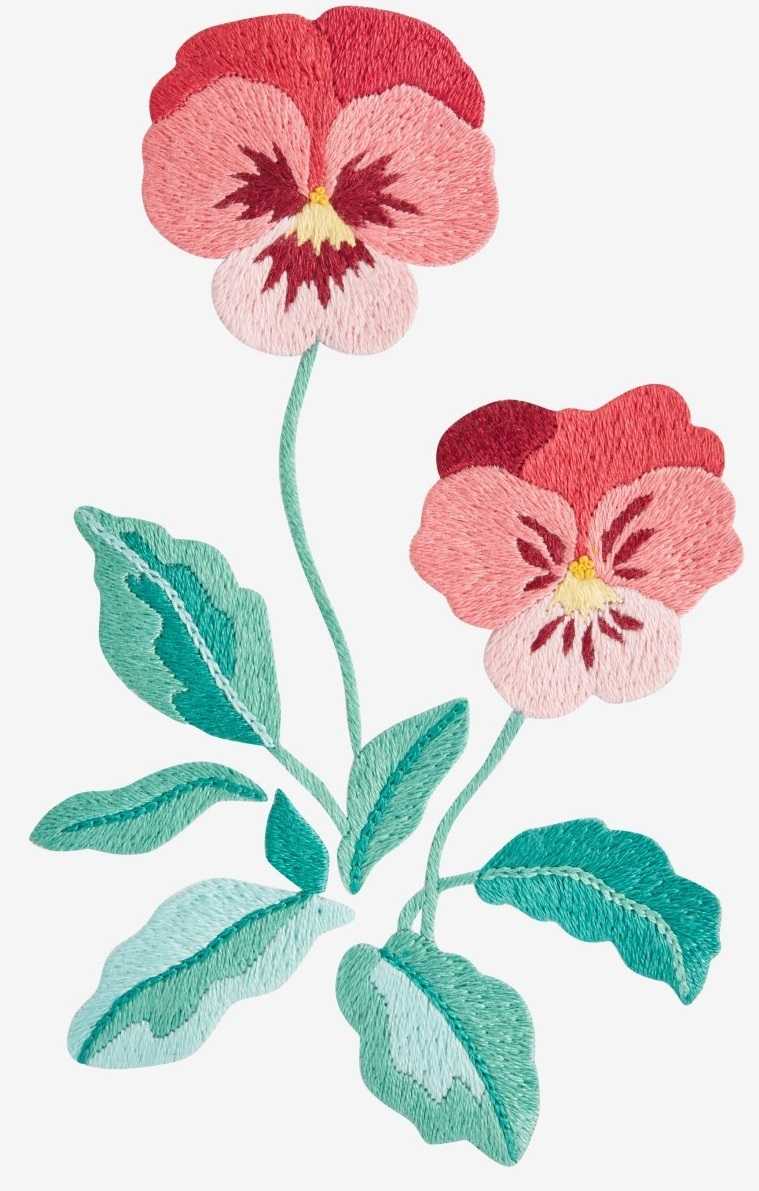
These pink pansies can dress up more than just a kitchen towel.
All you’ll need is fabric, a needle, a hoop, and thread. In our example we used DMC Mouline Special ART 117.
The steps are the same as in the previous design; the only difference is in the stitches used. Here we’ll also add the split stitch.

To embroider these flowers in satin stitch, the chart uses letters for the stitch type and numbers for the thread color. For example, A2 means alternating long and short stitches, as in thread painting, in dark pink color #3833.


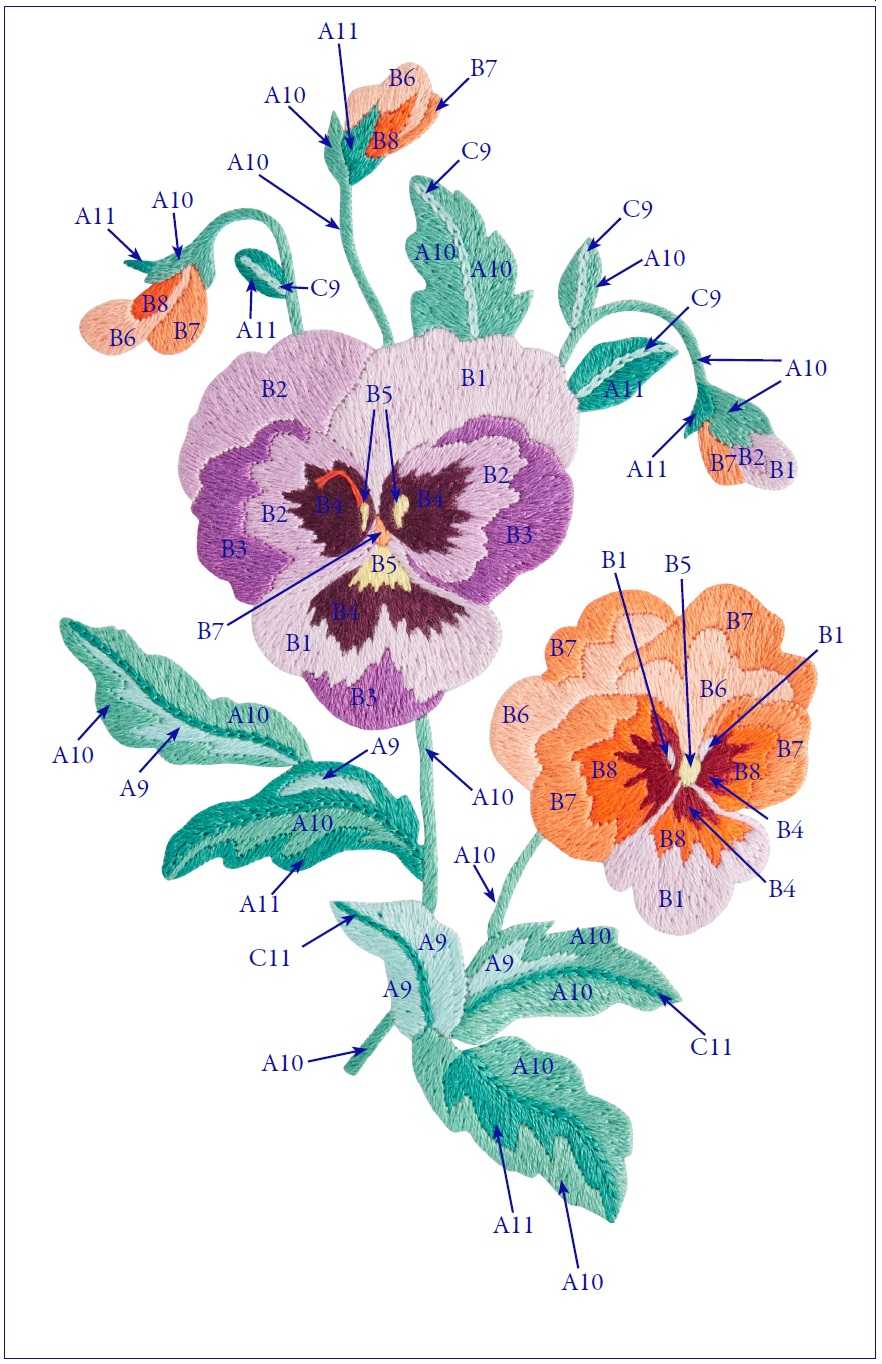
Multicolored Pansies
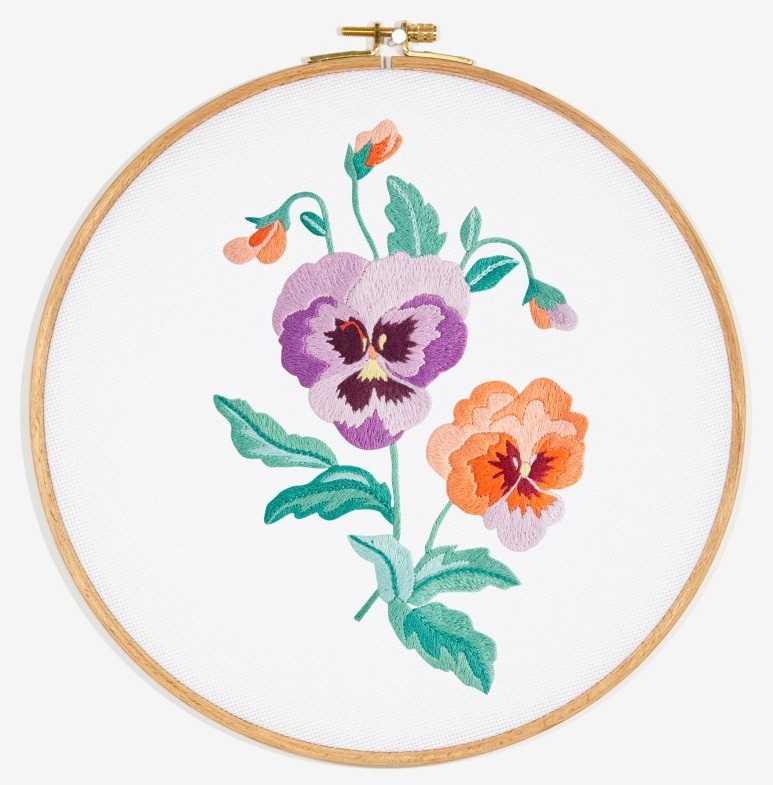
This pair of pansies needs the same materials as the previous designs: a needle, hoop, scissors, thimble, fabric, and DMC Mouline Special ART 117 floss.
It stitches up quickly and easily since it uses only a few types of stitches.
Keep in mind that satin stitch looks its best when the stitch length doesn’t exceed 1 cm.
Check the color chart often as you embroider.
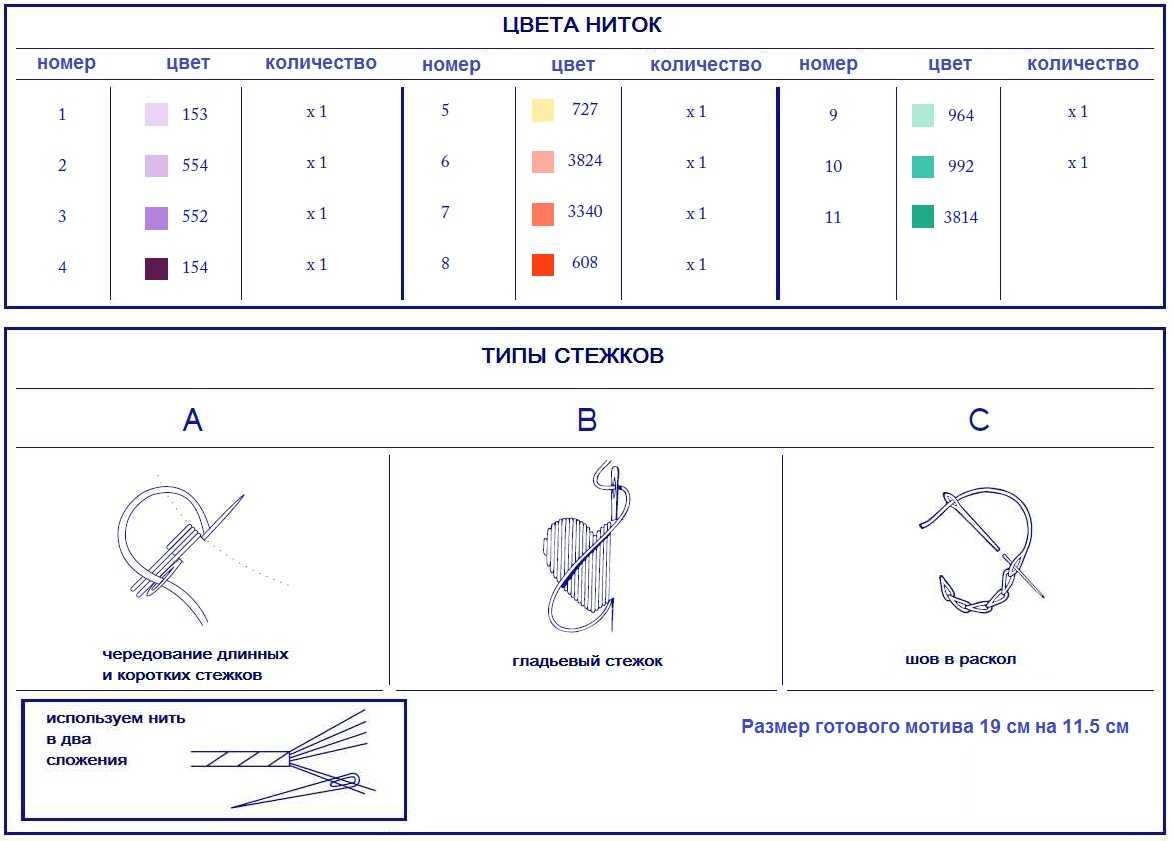

Three Pansies

These lovely pansies will also fit beautifully into a garden of embroidered flowers.
You’ll need the standard set of tools, fabric, and thread – we used DMC Mouline Special ART 117. If you can’t find these colors, you can substitute similar shades from other brands using a color conversion chart.
This design uses simple satin stitches, alternating long and short stitches, French knots, and backstitch.