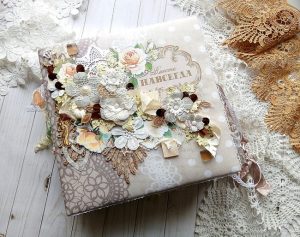
The Japanese word “oshibana” refers to the art of creating pictures and decorative panels using pressed dried plants. Appliqués crafted from leaves and flower petals look just like traditional paintings, but without a single drop of paint. This popular craft is enjoyed both as a standalone art form and as a beautiful element in scrapbooking.

We have compiled a selection of the best step-by-step tutorials on floral painting. These videos will help you create oshibana pictures from scratch, serving as a great source of creative inspiration and practical advice for beginners.
History of Floral Painting (Oshibana)
The creative technique of floral painting was established by ancient samurai around 600 years ago. Oshibana was designed to preserve the beauty of nature, which was highly revered in samurai philosophy. The landscapes crafted by Eastern masters conveyed personal emotions, brought peace to the mind, and helped maintain inner harmony. In Europe, noble ladies of the Victorian era became fascinated with floral appliqués. The craft later spread to other regions alongside a widespread passion for everything French.
Required Materials and Tools
The main materials include dried flowers and grasses, supplemented by seeds, dehydrated fruits, and tree bark. Twigs, poplar fluff, pine needles, and any types of leaves can also be utilized. To assemble a composition, you will need a piece of thick cardboard (sometimes just paper or fabric), tweezers, and PVA glue or a glue stick. Some crafters like to add beads, ribbons, and other decorative elements to their taste. The background can be tinted with watercolor or gouache, and fine details can be drawn with markers or felt-tip pens. The finished composition is often coated with varnish to add shine and ensure durability. Finally, decorative frames, with or without glass, are used for presentation.
Step-by-Step Oshibana Workflow
This master class on creating a portrait of a lady using dried natural materials on a paper base provides a step-by-step action plan.
- Transfer the drawing to tracing paper.
- Number the fragments of the drawing and cut them into separate parts.
- Prepare your pressed plants and straw ribbons.
- Use PVA glue to attach the straw, leaves, and petals to the tracing paper.
- Trim the edges precisely with a scalpel.
- Plan and integrate the background.
- Apply a protective coat of varnish.
- Frame the artwork under glass.
Creating the Composition
Perhaps the most challenging stage involves assembling the individual elements on the canvas. Do not rush to glue the details right away. It is much better to sketch the design first with a graphite pencil using faint, barely visible lines. Then, lay out the dried flowers with tweezers, matching them by texture, shade, and size. It is highly recommended to fully visualize and evaluate the composition before applying any glue; otherwise, you might have to redo the entire piece.
Oshibana “Seascape with a Ship”
Ships and the sea are frequent subjects in all forms of fine art. This master class by Lyudmila Krysina (a floral artist and member of the “Art-Alley” creative association) focuses on creating a canvas featuring a sailboat riding the waves. The result is a beautifully rich picture created without the use of any paints. It is crucial to carefully transfer the ship’s hull to tracing paper, cut it out, and cover the blank with plant materials with almost jeweler-like precision, preserving its original shape.
How to Dry Plants Yourself
By collecting beautiful flowers, grasses, and other plants yourself, you can create truly unique masterpieces. The very first herbarium has ancient Egyptian origins—it was found in the tomb of Tutankhamun’s mother in the form of dried laurel leaves. The well-known method of drying a herbarium inside a book has a significant drawback: it takes a long time (about a month) and often yields unpredictable results. A much faster and simpler method is drying with an iron. Fresh blossoms are covered with plain paper napkins (without prints or perforations) and ironed. The key is to constantly move the iron and avoid “cooking” the plants. For final drying, they should be placed in a book to prevent curling.
Preserving Plants with Glycerin
Some botanical materials may lose their original color or even crumble during long-term storage. One of the most reliable preservation methods is treating the plants in a glycerin solution. The author of the video demonstrates this technique using autumn maple leaves. The solution is prepared by mixing glycerin and water in a one-to-two ratio and bringing it to a boil. Once the mixture cools down, the natural materials are submerged one by one. Afterwards, they are stored in closed glass jars or cardboard boxes, layered with napkins. For the best results, add a few packets of silica gel (like those found in shoe boxes) to prevent dampness.
How to Tint Dried Flowers
Natural botanical colors often look somewhat muted and have a limited palette (shades of green, brown, yellow, red, and blue). Sometimes, you might want to introduce more vibrant colors and vivid shades. In specialized craft stores, almost all materials are sold pre-tinted to ensure a presentable appearance. If you decide to dye them yourself, it is important to apply the color carefully so as not to obscure the natural texture of the flower.
Craft Ideas and Inspiration
Using the oshibana technique, artists create stunning ornaments, landscapes, still lifes, portraits, and narrative scenes. At the initial stage, beginners usually craft small bouquets, single flowers, or sometimes just glue the elements as they are without forming a complex composition. Over time, you can experiment with more original shapes: butterflies, birds, animals, or baskets full of flowers. It is easier to start by creating small panels or greeting cards before moving on to large-scale projects and interior decor.
Framing and Presentation Options
It is best to craft the frames for your handmade masterpieces yourself to achieve a completely unique piece of art. Another advantage of a handmade frame is its budget-friendliness. You can take the cheapest wooden frames and tint them in the desired colors. A frame with an aged, vintage effect looks incredibly interesting and harmonious. To achieve this, you need to apply two contrasting shades of paint, rubbing the wood with a candle between the layers. The top tone is then lightly sanded off, resulting in a beautifully peeling, time-worn surface.
Any type of crafting is the ultimate cure for a bad mood and stress. Creating and admiring an oshibana picture quickly relieves fatigue, calms the mind, and provides deep aesthetic pleasure. These creations also make perfect gifts and wonderful interior decorations.