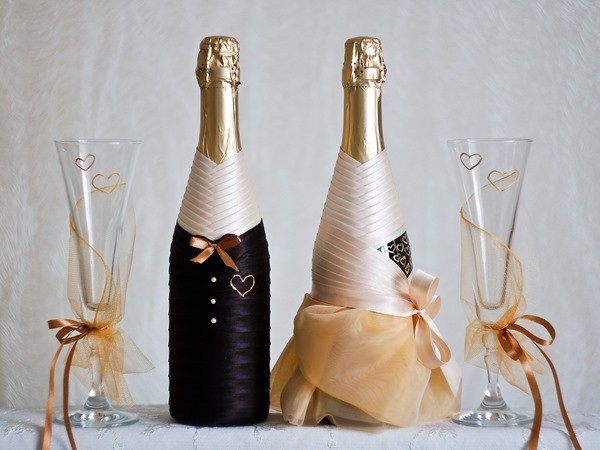
There are a million ways to decorate a wedding champagne bottle!
We offer you one simple yet very effective way to make a wedding bottle look festive, elegant, and truly memorable.
To decorate a champagne bottle fitting for the most solemn day of one’s life—a wedding—you will need:
- a bottle of champagne;
- white water-based acrylic paint or a can of white automotive spray paint;
- seed beads, faux pearls, small artificial boutonnieres, and silver mesh for bouquet decoration;
- crystal paste (a craft texture paste with glass beads);
- clear acrylic varnish;
- scissors and a hot glue gun.
Here is the step-by-step process:
1. Remove all labels, foil, and excise stamps from the bottle. Wash the surface with warm soapy water to remove adhesive residue, and dry it thoroughly.
2. Cut out a stencil in the shape of two interconnected hearts from regular paper (or masking tape for easier application).
3. Moisten the paper stencil slightly with water and stick it onto the bottle.
4. Take the spray paint and completely coat the champagne bottle. Instead of automotive spray paint, you can use water-based acrylic paint or even ordinary gouache. If working with gouache, mix it with PVA craft glue in a 1:1 ratio and apply it to the bottle’s surface using a sponge to create a beautiful, even texture.
5. When the paint is completely dry, carefully peel off the heart stencil and begin decorating the bottle. Follow the clear outline of the hearts with pearls strung on a thread, gluing them in place with a hot glue gun or a strong clear craft adhesive. The beads serve a dual purpose: they act as a beautiful decoration and perfectly “hide” any paint imperfections along the stencil edges. For this step, it is best to use a universal clear glue (like E6000 or similar crystal-clear adhesives) since it dries quickly and doesn’t leave yellow stains. Around the large pearls, you can glue small artificial flowers, seed beads, rhinestones, or smaller half-pearls. The result is incredibly harmonious and attractive.
6. Cut small leaves out of the silver mesh and intersperse them among your beads and flowers. The thin, shimmering mesh perfectly complements the snow-white background and adds an airy, delicate feel to the entire composition.
7. Crystal paste is ideal for making the wedding bottle look absolutely dazzling. It is best applied with a plastic spatula or a palette knife. Apply this magical sparkling paste to the bottle, drawing a wide, textured wave that spirals elegantly up towards the neck.
8. Next, while the paste is still wet, sprinkle it with fine seed beads (clear and silver) and gently press them into the crystal paste. Once everything has dried, complete the look by scattering and gluing tiny flowers and iridescent rhinestones across the bottle’s surface. The key is not to overdo it, otherwise, instead of an elegant decoration, it might look cluttered and tacky.
9. The final step in decorating your wedding bottle is varnishing. Carefully apply the clear acrylic varnish over the bottle with a soft brush, covering the entire painted surface. Make sure to generously coat the areas where the beads and rhinestones are attached to secure them firmly. Inspect your work and set your masterpiece aside to dry completely.
Present this exclusive, handcrafted gift to the newlyweds—you will see that their delight and appreciation will be endless!