Mosaic art has been known since ancient times. The first fragments were created by the Sumerians. The Greeks and Romans decorated their floors with mosaic patterns made of natural stone. Later, the Byzantines invented a new material — smalt, which was brighter and created a stunning artistic effect. This art form truly flourished during the Italian Renaissance. In the Russian Empire, Mikhail Lomonosov took up the production of smalt. Today, mosaic has transformed from a monumental art form into a popular decorative and applied craft for embellishing interiors and everyday objects.
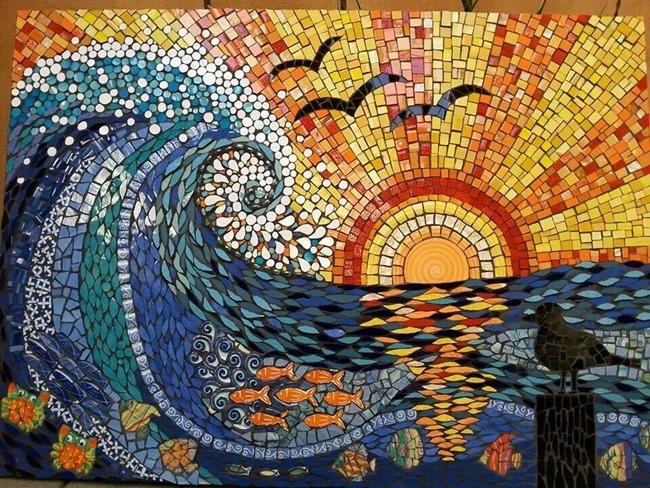
Mosaic art is highly accessible to everyone, even from the comfort of your home. Great examples of different mosaic techniques and variations are shown in the video tutorials on FreeHandmade.com.
Types of Mosaic Laying Techniques
Mosaic laying can be either artistic or matrix-based. In the first method, each element (tessera) is carefully adjusted to the desired shape and configuration, then laid out exactly according to the drawing. This results in an image with clear, distinct outlines. In the matrix method, the picture is laid out using whole square tiles, creating a pixelated effect. This is mostly suitable for large-scale projects like facade walls or swimming pools. With the direct laying technique, tesserae are placed face up; due to natural size differences, slight height variations will occur on the surface. The reverse laying method is better suited for achieving perfectly smooth surfaces like walls, floors, or countertops.
Tools and Materials
The most commonly used materials are glass tiles, smalt (colored opaque glass), natural stone, and stained glass. However, there is a huge variety of creative alternatives: ceramic tiles, food products (like coffee beans, eggshells, beans, and pasta), beads and rhinestones, epoxy resin, and seashells. In most cases, the primary tools you’ll need are nippers or tile pliers: disc nippers are ideal for glass, while straight-edge nippers work best for smalt. You might also need a special hammer for chipping stone. For adhesion, standard mounting glue, tile adhesive, and grout are used.
Florentine Style Mosaic
The Florentine technique is a lengthy and highly labor-intensive process. Creating a single panel can take anywhere from a month to a year, depending on its size and complexity. The work begins with carefully selecting a sketch. When choosing the stone, the artist must account for color, natural patterns, and texture. The sketch is divided into segments, and the craftsman must find a stone of the exact right color before carving out a perfectly shaped piece. Step by step, small stone fragments are glued together to form a composition that closely resembles a classical painted canvas.
Roman Style Mosaic
Roman mosaics are typically made from natural stone using the direct laying method. This structural technique can also be applied when working with alternative materials. The classical Roman method is intricate and usually requires special training: you must learn how to maintain a proper baseline, master technical laying, and execute precise tessera chipping. You can prepare the stones yourself—both smooth and rough textures, in rounded or geometric shapes, will work perfectly.
How to Cut Stone and Smalt
Classical tesserae usually have a square shape, but the actual designs you create will often feature curves and bends. Because of this, it is necessary to chip and shape the tesserae so they fit together seamlessly with minimal gaps. The proper technique involves shaping the squares into trapezoids by carefully chipping away small triangles from the edges. These exact same rules apply to cutting glass tiles.
Polymer Clay Mosaics
https://youtube.com/watch?v=aJf6Qy9SES0
A vibrant mosaic piece can easily be crafted from polymer clay. This flexible, plastic substance is frequently used for making small souvenirs, accessories, jewelry, and mini-sculptures. This master class will show you how to make a unique heart-shaped pendant. Polymer clay is an incredibly forgiving material for DIY crafts: its soft texture allows you to correct any mistakes as many times as you want before curing. To harden the finished piece, simply bake it in a conventional oven at 100-130°C (212-266°F).
Wood Mosaics (Intarsia & Marquetry)
A technique closely tied to traditional folk art is the wooden mosaic ornament. Craftsmen use thin slices of planed wood from trees like walnut, cherry, or beech. Using small pieces of wood veneer, you can assemble intricate ornamental motifs, floral compositions, and even detailed landscapes. These resulting designs are most frequently used to decorate wooden furniture or jewelry boxes. Occasionally, they are framed and displayed as standalone works of art.
Mosaics from Mixed Materials
Watch this master class on decorating a DIY wall-mounted key holder using broken dishes, pebbles, and seashells. Many of us have beautiful stones and shells brought back from a beach vacation just gathering dust at home. Broken plates and leftover ceramic tiles are also common household items that shouldn’t be thrown away. You can easily upcycle them! Feel free to incorporate small children’s toys, old costume jewelry, and stray beads to add texture and character.
Broken China Mosaics
A shattered favorite cup is no longer a reason to be upset; instead, it’s the perfect excuse to get crafty. The result can be a brand-new, exclusive piece of home decor: a wall clock, a plant pot, faux stained glass, a vase, a candle holder, an aroma lamp, a Christmas tree ornament, a trivet, a jewelry box, or a serving tray. The broken ceramics are simply trimmed down to an optimal size and laid out to form beautiful geometric patterns or floral motifs.
Epoxy Resin Mosaics
https://youtube.com/watch?v=2BrotcCfyso
Creating with epoxy opens up an endless world of interior design possibilities. Decorating countertops using the resin pouring technique (resin art) has become massively popular. A highly original variation of this is a table decorated with an epoxy mosaic. The secret trick lies in first applying a 3D barrier contour to outline the design, followed by color-filling the resulting individual cells with tinted resin.
Decorative and applied arts bring a wonderful element of creativity and aesthetics into our everyday routines. The ability to transform a pile of ordinary broken shards into a stunning handmade craft brings a deep sense of satisfaction and joy. Best of all, your finished mosaic masterpiece will delight the eye for many years to come.