Clothing accessories often have a decorative, theatrical purpose. Cardboard hats complement outfits for photoshoots or school plays, protect from the sun, complete masquerade costumes, and serve as beautiful doll accessories. Bright and sparkly designs are perfect for children’s matinees or adult evening parties, while miniature pieces in muted tones will liven up an everyday hairpin or headband, becoming a stylish element of your hairstyle.
This collection of step-by-step video tutorials and DIY craft masterclasses will help you easily make various headpieces and cardboard hats right at home.
Classic Cardboard Top Hat
You will need: thick cardboard, a long ruler, a set square, a compass, scissors, and a graphite pencil. To accurately determine the right sizes using a tape measure, the author uses a real model. The radius and diameter of the circles are calculated using a mathematical formula. The parts are glued together with PVA glue. It is not recommended to use unstable glue sticks or double-sided tape, which loses its stickiness over time. Fancy dress decoration options are also described: covering the hat with colored glitter paper, attaching figures, tying colorful ribbons, or painting it with acrylics.
DIY Party Hat or Fascinator
With the help of this video, anyone can master the skill of creating a spectacular hat for a special occasion or costume ball. Made by hand and decorated with silver trim and red corrugated paper, it will help create an original, slightly provocative look in the style of early 20th-century beauties. Supplemented with an organza veil and a white rose with beads, the piece is securely attached to the hair. The decor and diameter can be adjusted as desired.
Miniature Hat Hair Accessory
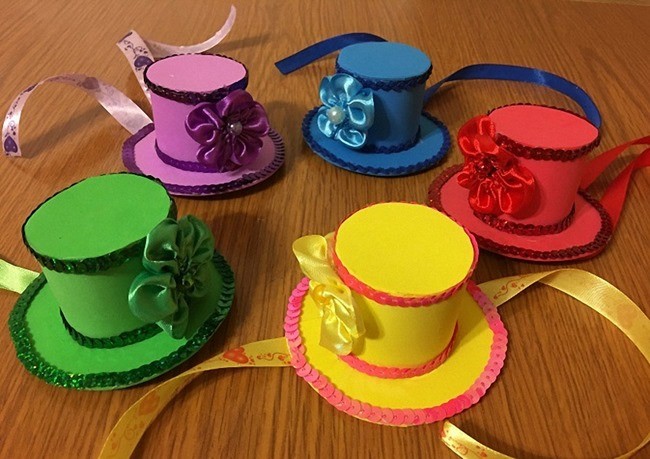
You can easily make small, original top hats. They are used as hair ornaments, children’s hair clips, or for decorating topiaries and handmade dolls. For the base, you will need a piece of thick cardboard and a round (cylindrical) cardboard core from cling film or toilet paper. The diameter depends on your desired size. You can use any fabric, preferably a soft one to form beautiful folds or waves. The parts are connected with hot glue and can be decorated with flowers, bows, rhinestones, faux pearl beads, and other accessories.
Origami: Cardboard Hat
The author of the “Origami Show” channel demonstrates an easy way to make a hat from colored cardboard for festive decor. You will need: 2 sheets of A4 paper, a glue stick, scissors, and a simple pencil. The required diameter is determined with a ruler, and the circles are drawn with a compass. The decoration features a contrasting satin ribbon with an interesting technique for forming a bow. This method is also perfect for creating a tiny hat for a doll.
From Household Materials
The author uses an ordinary large box made of thick cardboard. The manufacturing technology is extremely simple, making it a wonderful idea for children’s matinees or participating in theatrical performances. The parts are cut out with a utility knife and scissors. You will need a black marker to make markings. All parts are fastened with PVA glue, hot melt glue, or double-sided tape. Regular colored gouache does not stick to the tape, so the author recommends painting it with special graffiti spray paint.
Mushroom Hat Costume (Boletus)
This video from the “SuperTonic” channel will be interesting for children. Four-year-old Anton shows how to make a fun mushroom costume with your own hands. The base of the hat consists of cardboard rings cut out and secured with tape on a long rectangular strip with notches. Using a needle and thread, they are covered with padding polyester (or foam rubber, cotton wool) and then with brown fabric. Thus, the piece acquires the realistic shape of a mushroom cap. Leaves and acorns cut from felt are glued on top, complementing the resemblance to a boletus mushroom.
Doll World (Miniature Hat)
For this craft, you will need cardboard, thin paper or napkins, acrylic paint, and decorative elements. A cut-out cardboard ring is placed on a lamp or the head of a chosen toy, previously covered with cellophane. A hat shape is formed using PVA glue and layers of small pieces of paper (papier-mâché style). Painted in bright colors and decorated with beads, flowers, and ribbons, these miniature hats become real mini-masterpieces.
Hat for Little Ladies
How to make a beautiful hat on a headband yourself? You need: a small sheet of cardboard and a cardboard tube. The step-by-step process will teach you the correct handling of a circle cutter, a paper knife, and attaching a satin ribbon to the main parts with a glue gun. This accessory, decorated with small roses, satin petals, and pearl half-beads, sits securely on a comfortable headband and makes an elegant hair decoration for girls.
Satin Fabric Hat
In this video, Marina Guloyan shares a brilliant idea for creating a girl’s hat from cardboard and an empty tape core. The step-by-step manufacturing process is shown in detail. The fabric is secured by gathering it on the base with a needle and thread to obtain light waves. A glue gun and strong adhesive are used for quick assembly. Pastel artificial flowers contrast nicely and look highly original against the white satin fabric. The finished product can be attached to a headband, hairband, or barrette.
For Any Holiday (Universal Hat)
The video shows the process of making a universal hat for carnivals and festive events. The cardboard base is covered with a first layer of paint, followed by patterned tulle fabric. A contrasting second layer is applied from a spray can. The result is an unusual “masquerade” texture and color. Quick-drying glue is used to attach the parts. Tall, classically shaped with an oval brim and a satin ribbon, this hat is versatile enough to suit both men and women.