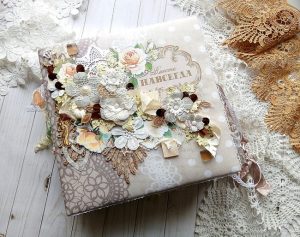
Kids, teens, and adults all dream of adventures, mysteries, and magic. The main elements of this mysterious world are old books, ancient manuscripts, and vintage portraits. Modern technology allows you to download and print any “antiquity,” but that remains merely a visual image. However, paper that has yellowed with time, is rough to the touch, and torn in places is a completely different story. With it, you can organize a treasure hunt, create a vintage notebook, a photo album, a scrapbook for your herbarium or memorabilia, decorate a photo frame, or write a unique greeting letter.
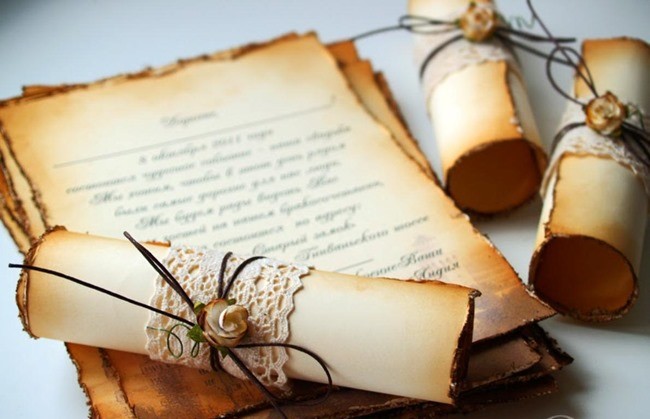
How can you age paper yourself at home? Watch these useful DIY videos on FreeHandmade.com. This craft will become a perfect desk decoration, an interior highlight, or a highly original gift.
Three Ways to Age Paper at Home
You can create various retro-style shades using instant coffee and tea bags. The stronger you brew them, the richer the result will be. To enhance the effect, Masha, a crafter and creative blog creator, works with a brush and a hairdryer, applying the liquid in several layers and drying it. The third option is watercolor. By painting, you can vary the color scheme and intensity, experiment with gradients, and add drawings. The subtleties of the process are shown in the video, including how to flatten the paper with an iron.
Aging Paper for a Book
https://youtube.com/watch?v=oHDE9jWJXkw
Liya decided to make a “Book of Magic”, but first, she needed to give it an antique look. For this project, you will need paper sheets, coffee and tea, boiling water, and a brewing container. Liya tints the paper in a tall vase: it is fast, convenient, and keeps her hands clean. Light spots are colored using a tea bag. In the second part, Liya explains the nuances of drying and straightening: how to do it in the oven without getting grate marks, the disadvantages of this method, how to speed up the work with a hairdryer, and the specifics of smoothing the sheets under a heavy weight or with an iron.
Testing Different Paper Types
Nastya conducts an experiment – she dips sheets of various thicknesses (checkered notebook paper, thin printer paper, and thick cardstock) into the coloring solution. At the end, she compares the resulting effects. This tutorial will appeal to fans of precise instructions (even the soaking time is specified). The procedure is demonstrated step-by-step and is simple enough to repeat with children.
Treasure Hunt Map
From this video, viewers will learn how to turn a simple drawing into an ancient treasure map in just a few minutes. The finished artwork is tinted by dipping it into strong tea. To form dark stains and inkblots, coffee granules are scattered over the wet surface. Once soaked, the ingredients produce more intense spots. For realism, you can tear the edges, roll the map into a tube, and tie it with a piece of rough twine.
Tinting Paper with Chicory
Anna Yaruta is a blogger, scrapbooker, and author of simple, accessible master classes. At the beginning of the video, Anna shows a handmade book inspired by Harry Potter. Looking at the pages, you would truly believe the manuscript had lain in the attic of an abandoned house for a hundred years. In this lesson, viewers will learn the secrets of preparing the future pages: creating stains, streaks, drops, and creases, how to speed up the drying process, and how to create dark veins. In conclusion, she talks about the technique of softening stiff paper using an ordinary spoon. By rubbing the dried sheets with it, you can achieve a soft, pleasant-to-the-touch texture.
Imitating an Ancient Scroll
This is a short educational video demonstrating the step-by-step process of making a small scroll in an ancient style. In addition to aging materials, you will need wooden skewers, PVA glue, a hot glue gun, paints, and oil pastels. For greater realism, the edges are charred with a lighter. A loop made of rough rope matching the craft’s aesthetic is attached for hanging. The inscription and vignette-style patterns are made using a stamp. The result is a highly original item perfect for a gift or interior decoration.
Creating an Ancient Manuscript
The process of making pages with inscriptions in the style of an ancient manuscript takes just a few minutes. You need to open Microsoft Word, find a beautiful font that visually resembles handwritten text, and type 5–6 sentences in Latin characters. After printing the text pages, you must age the sheets using any technique (the author uses the standard coffee/tea method) and dry them. You can also experiment with burning the edges, crumpling the paper, and creating dark stains.
A Quick and Easy Way to Age Paper
The author gives step-by-step instructions in a concise and brief format using a treasure map as an example. The duration of immersion in the solution is exactly 10 minutes. Additionally, the video explains how to speed up drying, remove excess moisture by blotting the blanks with a newspaper, and apply realistic dark spots. The fire treatment is done over a candle flame (which is much more convenient than using a lighter). You can also create a darkening effect in the middle of the map (unlike burning the edges, the risk of ignition here is minimal).
Professional Gift Scrolls
This is an overview video from a workshop that specializes in selling premium gift scrolls. It shows the manufacturing technology of the product, from shaping and coloring the paper to sealing it. Experienced crafters can use this video as an excellent source of ideas – it demonstrates the formation of wooden holders, applying a wax seal, and burning the wood until a retro coating appears. If you plan to create a craft for a greeting, you should try writing the inscription with an ink pen, just like the studio masters do. The video is short and lacks author commentary, but people engaged in needlework will find a wealth of useful information.
Aged Paper for a Notebook
Alina plans to make a retro-style notebook. How can you speed up soaking and remove excess liquid using a ruler or the edge of a container? Why shouldn’t you lay down a newspaper for drying? The author uses an ordinary clothes drying rack instead. After a few hours (unlike most tutorials, which recommend doing this during the painting process), the author begins decorating. She leaves circular marks with a glass dipped in the solution, and creates splashes and inkblots. The next stage is decorating with ink stamps. The final touch is adding the warm scent of cinnamon and cloves. At the end, Alina repeats the same procedure with pieces of fabric and lace; these will be extremely useful in decorating the final notebook cover.
In addition to classic methods, there are several alternative ones. A highly realistic look can be achieved by smearing the paper with high-fat milk, followed by ironing it until brown spots appear. When working with brilliant green (Zelenka), you can get a pleasant vintage emerald color. Placing the wet paper in a sunny spot will result in a beautiful, even yellow hue. For variety, you can even use a solution of potassium permanganate or iodine. To add authentic roughness, crafters rub the surface with fine sandpaper, while ribbed textures can be created by leaving the paper to dry on uneven surfaces.