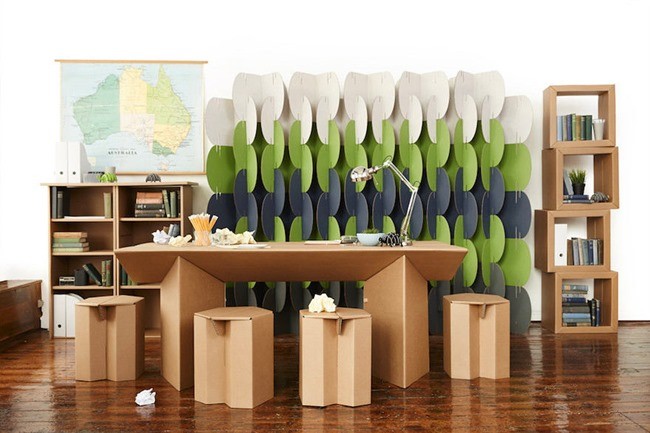
Making DIY cardboard furniture is a budget-friendly way to create a comfortable environment, an opportunity to show your imagination, and learn to experiment. The material is easy to process, highly durable, environmentally friendly, and economical. Thanks to its light weight, it is easily transported. You can make a classic model or a bizarre shape with plenty of decorating possibilities.
We have collected free step-by-step video tutorials and master classes on making cardboard furniture at home.
Cardboard Shelving Unit
Have unnecessary boxes accumulated and you want to get a new shelving unit? A video tutorial will help turn boxes into a sturdy rack. The process is laborious and takes time, but the result is worth it. At the first stage, it is necessary to draw a diagram (dimensions of shelves, side walls, drawers) without making mistakes in the accuracy of calculations. All parts are carefully cut out with a utility knife, put together, and glued with hot melt and strong universal glue. For strength, the cardboard is folded into four layers. The product is decorated with self-adhesive woodgrain film and adorned with handles made of acrylic decorative stones. The finished product is suitable for books, toys, and storing small items.
Provence Style Shelf
The author of the “DIY Magician” channel gives a master class on making an elegant kitchen rack from large packaging boxes from household appliances. The main stage includes cutting out parts and marking the locations of future shelves. It is advised to number the cut-out parts so as not to confuse the sequence during work. For sealing, the cardboard is glued in four layers and dries under a press for a day. When assembling, it is recommended to use high-quality PVA glue. Hiding the unevenness of the entire product is achieved with a finishing putty. To create an aged and shimmering effect, acrylic paint is applied in several layers—first golden, then baked milk color, and finally varnish.
Cardboard Computer Desk
A step-by-step process of making a small computer desk. Pre-cut parts are demonstrated indicating exact parameters and the required amount. The cardboard is folded into several layers for strength. To connect the parts, depending on their function, the author uses three types of glue: hot melt, superglue, and PVA. The process of strengthening the legs and tabletop with strips folded in the form of geometric shapes is shown in detail. The internal filling includes over 100 parts. The final touch is decoration with self-adhesive marble-patterned film. The video is without commentary, set to a musical composition.
Crafter’s Chest of Drawers
After watching this video, you can learn about a simple way to make a small chest of drawers from four unnecessary boxes placed in one row. To connect them, wide double-sided and regular tape are needed; to strengthen the structure, it is pasted over with a second layer of cardboard. Handles made from small square boxes of the same size are attached to the drawers. The product is decorated with gray tape to match the color of the working material, and colored stripes are made with red electrical tape. The author recommends using the dresser for storing needlework and knitting supplies.
Cardboard Mezzanine Storage
Sergey Khristich recommends an easy way to make a budget version of a mezzanine to organize the space above a wardrobe. Blanks of the required sizes are cut out of cardboard boxes, and a bend is formed by pressing. The parts are connected using a glue gun. The finished product consists of spacious boxes with shelves and doors. The decor is thick white paper. Two options are shown: a cluttered top of a cabinet and a more aesthetic one, with mezzanines and small things hidden inside them. The video features musical accompaniment and text explanations without voice comments.
Shelves and a Small Dresser
An interesting idea for making a hallway shelf for storing bags and small items from Yana Matveeva. A base is formed from ordinary cardboard ice cream boxes—the box and shelves are mounted on narrow slats. Joints, corners, and rough edges are covered with paper. The decor features a double coating of acrylic paint. Using this principle, you can make a pencil case or a hanging shelf for children’s toys. Yana recommends using decorative paper to mask minor defects. In addition, she shows a miniature dresser resembling a jewelry box with a hinged lid and pull-out compartments, made by hand from small washing powder packs.
DIY Coffee Table
The author of the video suggests making a small table at home with a minimum of materials spent. In sheets of working material glued together for density, four circles are cut along the edges according to the diameter of cardboard tubes serving as legs. If you do not seal them, leaving the tubes open at the top of the homemade tabletop, you get a kind of cup for storing office supplies. It is decorated with colorful stickers. You can use it as a laptop stand, during tea drinking, or for board games. When covered with a self-adhesive film, it turns into a convenient stand for indoor plants.
Children’s Shelving Unit
How to make a stylish shelving unit that will decorate any children’s room? This video shows two options in the form of funny animals: an elephant and a sheep. They are made according to one layout, but of different shapes. The figures are made without sharp corners, preventing any risk of a child getting hurt. It shows in detail how to make a sturdy frame, work with patterns, calculate the length, and connect the parts into a single whole. It is painted with thick acrylic paint. After drying, it is fixed with varnish for greater rigidity. It’s a model of an unusual, interesting shape, convenient for storing books and toys.
Children’s Cardboard Furniture
https://youtube.com/watch?v=cfc1HfoTHOI
A video for those who want to please their child with toy furniture. The base of the play kitchen is three medium-sized boxes and a long one from a synthesizer. Partitions and multifunctional side walls are made of thick cardboard glued together. Wide tape is required to connect the parts. Next is the creative process: making doors for cabinets, an oven with clear plastic, a sink from a metal bowl, and an imitation stove burner. Decor includes “brick” colored paper and a “marble” countertop. At the end of the video, a beautiful finished model with toy kitchen utensils is shown.
Cardboard Corner Shelf
The video begins by showing an elegant corner shelf with decorative figures arranged on it. It takes up little space and fits perfectly into any interior. To make it, you need a sheet of ordinary thick cardboard. The author explains in an accessible way how to draw semicircular details using a measuring tape, correctly calculate the ratio of the dimensions of the side walls and internal partitions, and ways to seal them. When assembling the model, a strong polymer glue and a hot glue gun are used. For decoration, white acrylic paint and varnish are applied. In addition, it is pasted with golden braid and lace with rhinestones.
A significant disadvantage of such products is intolerance to dampness. To extend the service life, protection is needed—coating with stained glass or oil paint, varnish, or self-adhesive film. To avoid injury, special attention must be paid to the quality of the cardboard, the correct assembly of parts, and the method of fastening.


